Winter is fast approaching, and with it comes the desire to fill our homes with a fairy-tale atmosphere and coziness. Of course, flat paper cutouts on windows are a classic, but let’s agree, they can look a bit simple. What if you could step outside the box and create a true 3D marvel that will impress both kids and adults?
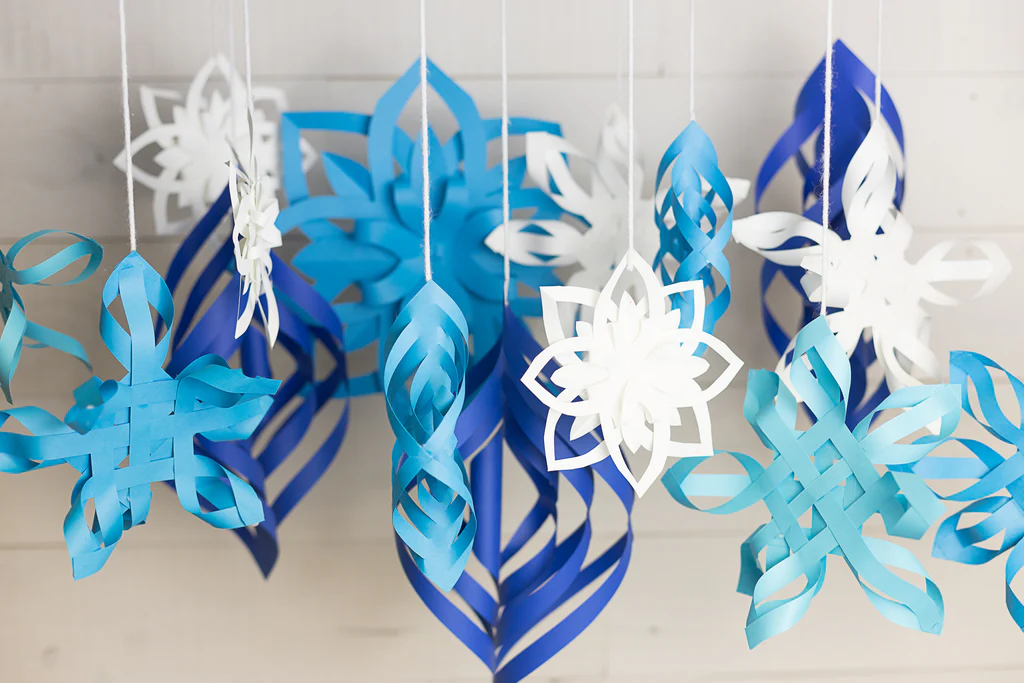
Turn ordinary paper into magical 3D decor.
Many people think that making 3D paper snowflakes is complicated and requires special skills. Forget about it! This article is your step-by-step guide to the world of easy and exciting winter crafting. We’ve prepared several simple master classes that will help you effortlessly turn ordinary sheets of paper into spectacular and stylish decorations. Get your scissors, glue, and good mood ready — let’s start creating 3D magic!
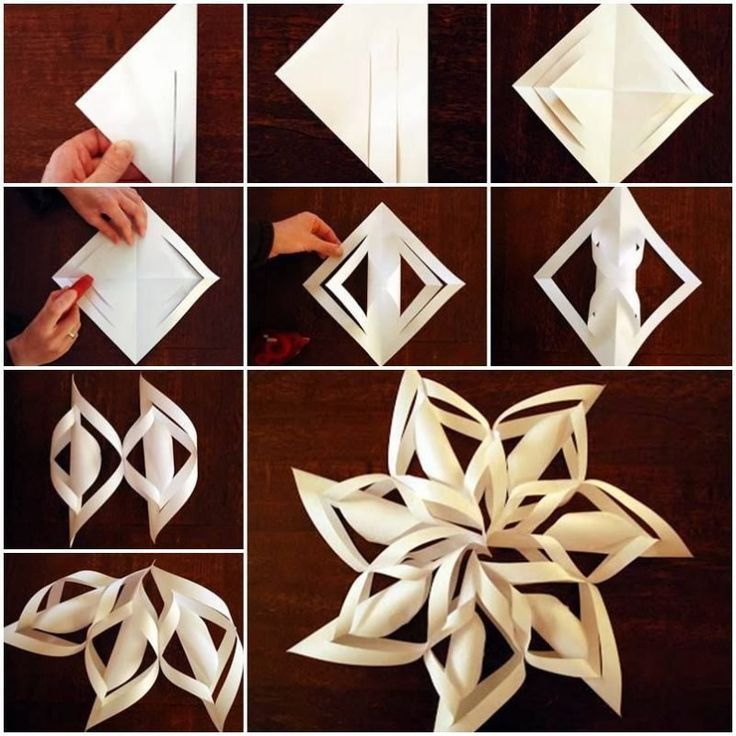
Master Class #1: How to Make the Classic 6-Point 3D Paper Snowflake
This is probably the most popular 3D snowflake model. It looks very impressive but is surprisingly easy to make. Once you understand the principle, you can create entire snowfalls!
What you’ll need:
-
6 identical square sheets of paper (white or colored).
-
Scissors.
-
A glue stick or a stapler.
-
A ruler and pencil (optional, for precision).
Step 1: Prepare the Modules
-
Take one square sheet and fold it in half diagonally to form a triangle.
-
Position the triangle with the fold at the bottom. Using a ruler and pencil, draw 3-4 parallel lines from one side to the other, stopping about half an inch (1-1.5 cm) from the edge.
-
Carefully cut along the marked lines, starting from the folded side. Do not cut all the way through!
Step 2: Create the 3D Shape
-
Unfold the paper. You will have a square with cuts.
-
Starting from the center, roll the two smallest strips into a tube and glue their tips together.
-
Flip the paper over to the other side. Take the next two strips, connect them, and glue.
-
Flip it over again and glue the next pair of strips. Continue alternating sides until all strips are glued. You will have one 3D point.
Step 3: Assemble the Snowflake
-
Repeat steps 1 and 2 for the remaining 5 squares. You should have 6 identical points.
-
Staple or glue three points together at their base. Do the same with the other three.
-
Now, connect the two resulting parts in the center. To help the snowflake hold its shape, also staple the points where they touch each other.
Follow these simple steps for an impressive result.
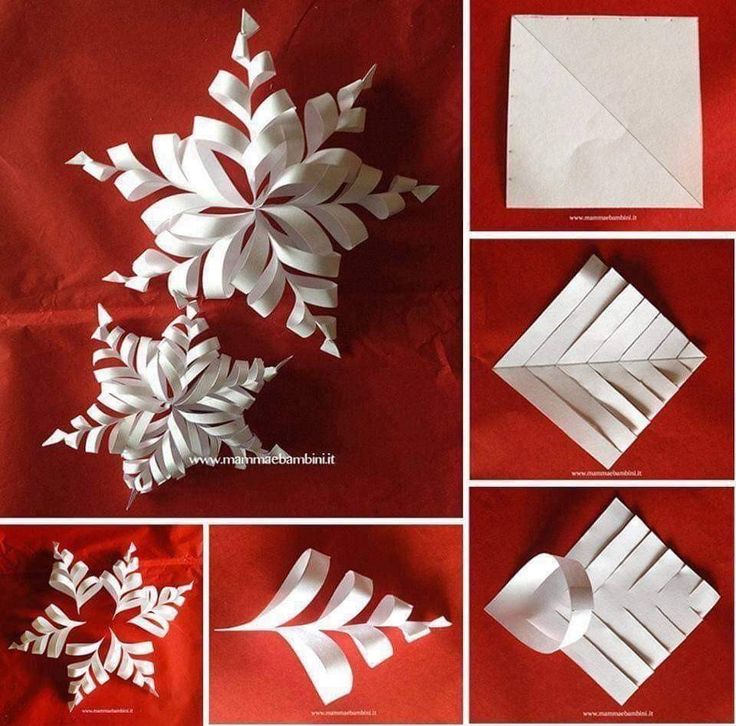
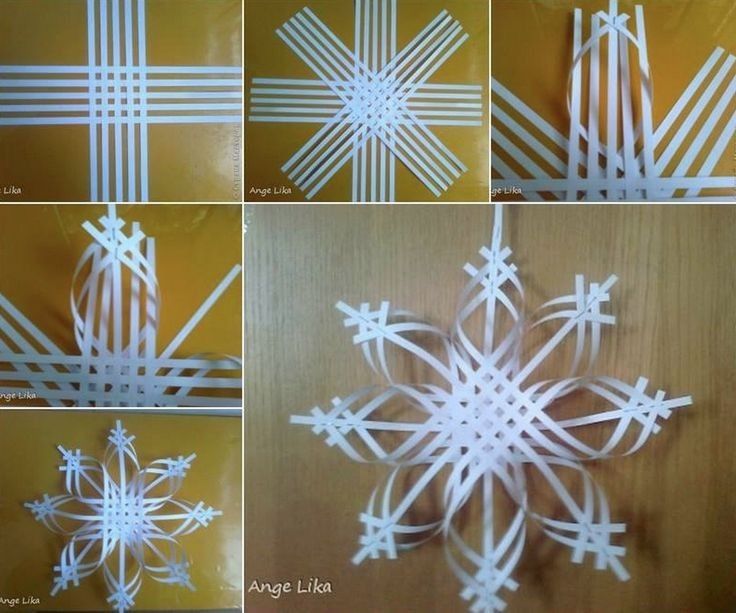
Master Class #2: How to Make an Easy Fluffy Paper Snowflake
This option looks very delicate and airy, resembling both a snowflake and a winter flower. This is a perfect master class for crafting with kids.
What you’ll need:
-
2 sheets of A4 paper.
-
Scissors.
-
Glue.
-
Thread.
Step 1: Make the “Accordions”
-
Take one sheet of paper and fold it into an “accordion” along the short side. The width of one fold should be about 1 inch (1.5-2 cm).
-
Do the same with the second sheet of paper.
Step 2: Create the Pattern
-
Fold each “accordion” exactly in half.
-
Tie each folded piece tightly in the middle with a thread.
-
Now, it’s time for creativity! Use scissors to cut patterns on the edges and sides of the “accordion.” You can make triangular cuts, round the edges—experiment! The more cuts, the more intricate the snowflake will be.
Step 3: Assemble the Fluffy Beauty
-
Take one piece and fan it out. Glue the inner edges together to form a semicircle.
-
Repeat with the second piece.
-
Now, simply glue the two resulting semicircles together. Your fluffy snowflake is ready!
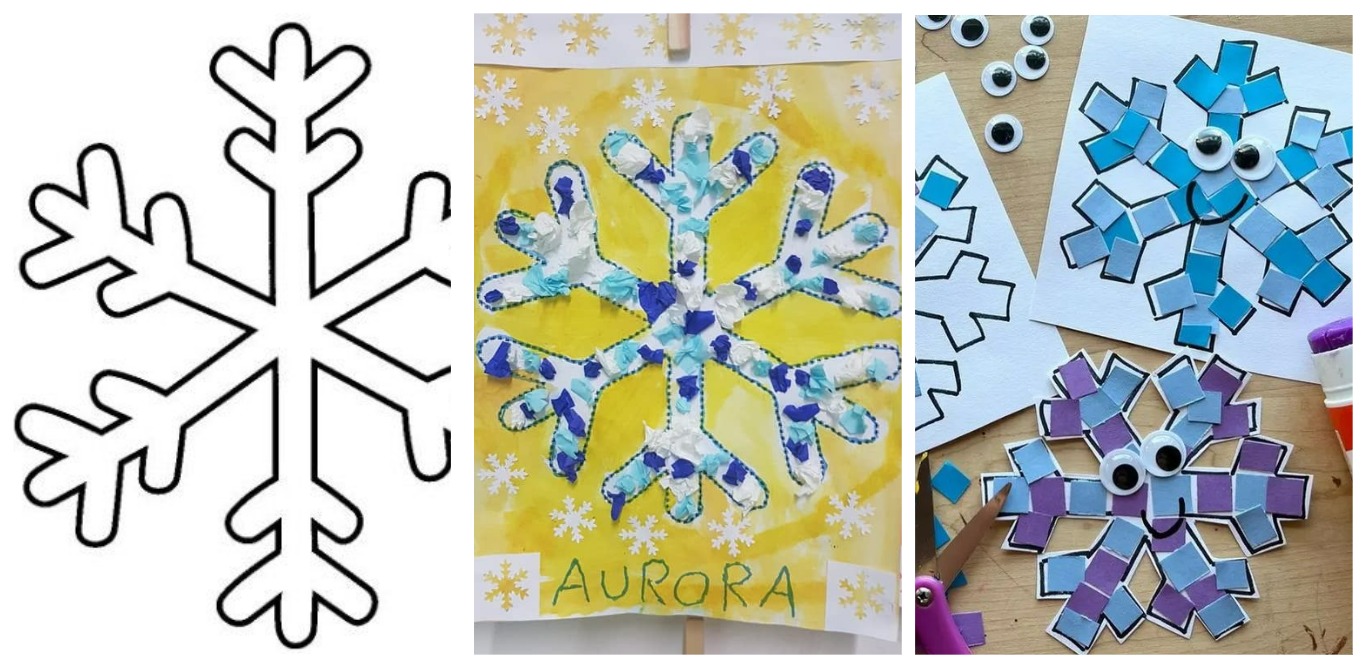
Master Class #3: Easy Layered 3D Paper Snowflake for Kids
This is the simplest way to create a 3D effect, perfect for the youngest crafters.
What you’ll need:
-
Paper (you can use different shades of one color, like blue and light blue).
-
Scissors.
-
Glue.
Instructions:
-
Cut out 2-3 regular flat snowflakes of the same shape but different sizes. To do this, fold a square sheet of paper several times into a triangle and cut out patterns.
-
Now, simply glue the snowflakes on top of each other — from largest to smallest, aligning their centers.
-
The layering creates a simple but noticeable 3D effect.
Frequently Asked Questions (FAQ)
1. What paper is best for making 3D paper snowflakes?
Regular office paper (80 g/m²) is ideal for most models. It’s flexible enough for folding but also holds its shape well. For larger snowflakes, you can use slightly thicker paper so the structure doesn’t sag.
2. Is it better to use glue or a stapler?
A stapler is a quick and reliable method, especially for connecting the main parts. A glue stick is perfect for securing smaller elements, as it doesn’t warp the paper.
3. How can I decorate the finished 3D paper snowflakes?
You can lightly brush the finished snowflakes with PVA glue and sprinkle them with glitter, or glue a rhinestone or bead in the center. This will add a festive sparkle.
Conclusion
Making 3D paper snowflakes is not just a way to decorate your home, but also a wonderful opportunity to spend time with your family, immersing yourself in a meditative and creative process. These simple master classes prove that you don’t need expensive materials to create a true winter fairy tale — just a sheet of paper, scissors, and a little inspiration.
Don’t be afraid to experiment with colors, sizes, and patterns. Create a whole collection of unique 3D snowflakes that will fill your home with a festive and cozy atmosphere!
Which 3D snowflake did you like the most? Share your results and ideas in the comments!